How to Create Your Own Custom Filter Driver for Windows
A Windows Filter Driver is a specialized driver within the Microsoft Windows operating system. It serves as a mechanism to intercept and modify the behavior of specific system operations. These drivers function at a low level within the operating system, enabling the monitoring or alteration of interactions between the OS and its hardware or software components. Filter drivers essentially “filter” I/O requests (input/output), intercepting and potentially modifying them for a particular device or file system. For instance, a file system filter driver might intercept file read or write requests, allowing it to implement additional security checks, perform encryption/decryption, or compile statistics.
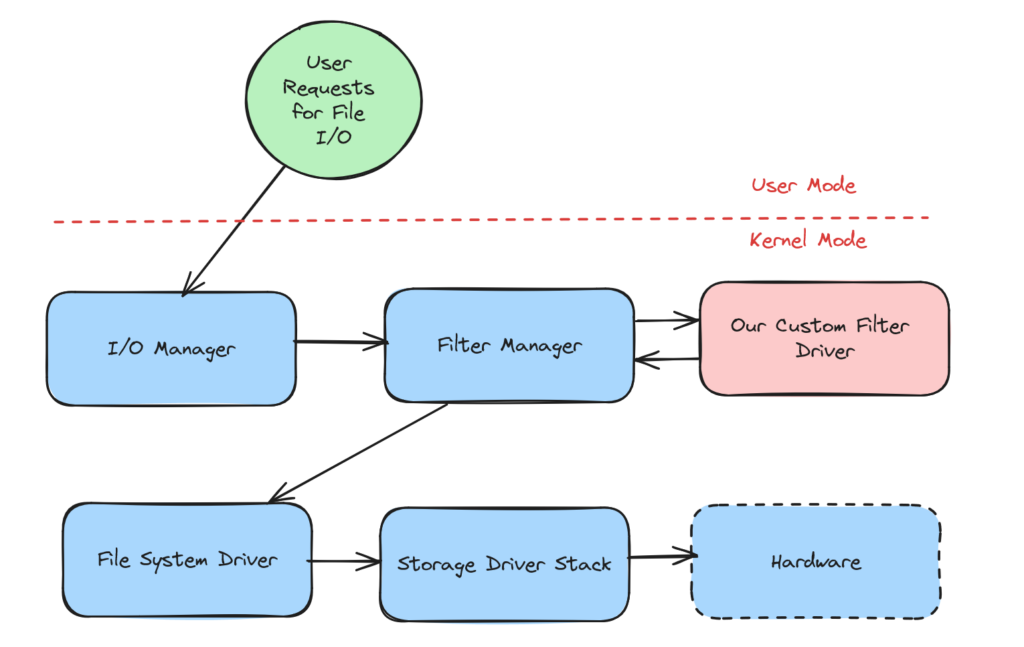
In this experiment, we aim to create our own filter driver that will intentionally delay every I/O operation by 5 seconds. This is purely for testing and educational purposes, to demonstrate how inefficient or poorly performing software filter drivers can impact system performance.
This guide will walk you through setting up a test environment, installing all necessary tools, and providing some sample code for the driver itself. I will be utilizing Azure’s nested virtualization VM for this demonstration, but you can alternatively use a local Hyper-V VM on your workstation. The choice of environment does not significantly impact the exercise.
I’m assuming you already have Hyper-V installed, along with a debug/test VM within it. In this example, I’m using Windows Server (WS) 2022 as the VM host and WS 2019 as the VM guest. However, you have the flexibility to choose other options, as long as they are compatible with the Windows SDK and WDK. Firstly, install the guest operating system where you intend to test your driver. I strongly recommend using a Hyper-V VM, as it significantly simplifies the debugging and testing processes.
Let’s prepare our Guest VM for debugging and driver sideloading. Execute the following commands with administrative privileges:
Enable debugging:
bcdedit /debug on
Configure debug settings to use a serial port, specifying the debug port number (replace n with the actual port number) and baud rate:
bcdedit /dbgsettings serial debugport:n baudrate:115200
Enable test signing to allow the installation of unsigned drivers:
bcdedit /set testsigning on
After running these commands, shut down the VM.
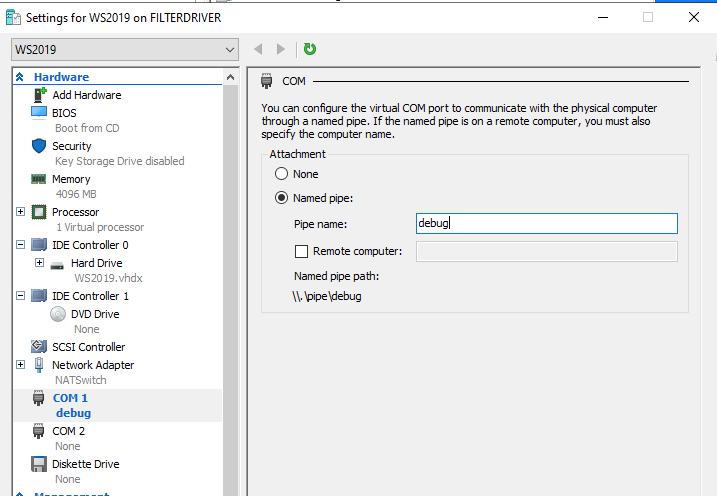
Next, in the Hyper-V properties, configure the COM port as follows:
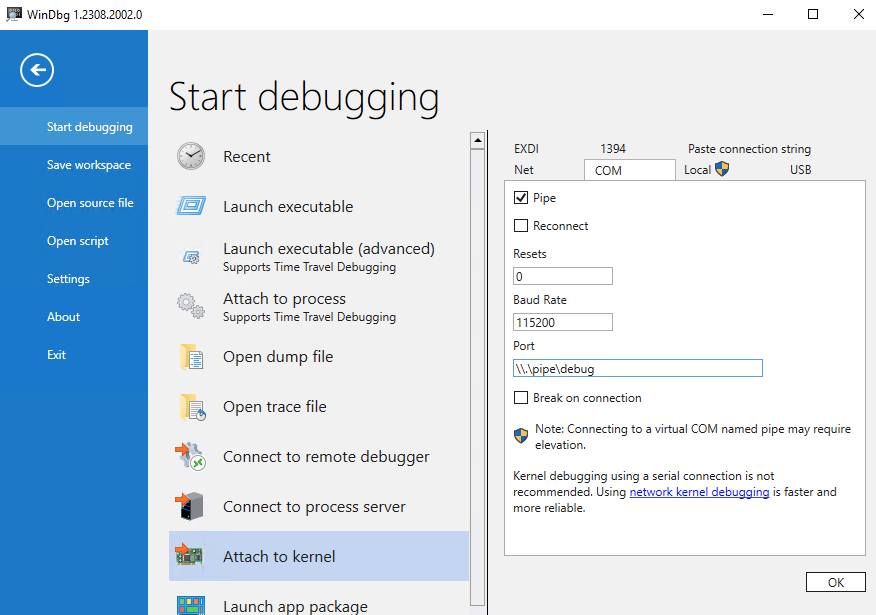
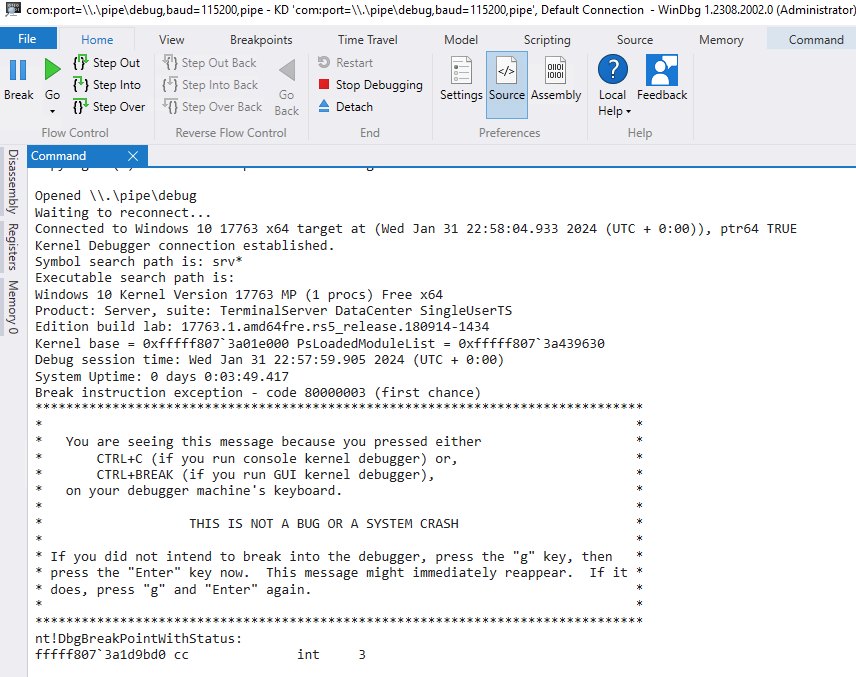
Check connection to your VM via WinDBG.
You are now ready to debug your test VM. Let’s proceed with setting up the Host OS. For this, you’ll need the Windows Software Development Kit (SDK), Windows Driver Kit (WDK), and Visual Studio.
The installation steps for the WDK are thoroughly outlined in the official documentation. Simply follow the guide provided there to ensure a correct setup. Having these tools properly installed is crucial for driver development and testing.
Download the Windows Driver Kit (WDK) – Windows drivers | Microsoft Learn
At this stage, if you’ve followed the instructions correctly, you should have:
- A Guest VM with debugging enabled.
- The Windows Software Development Kit (SDK) and Windows Driver Kit (WDK) installed.
- Visual Studio installed on your host machine.
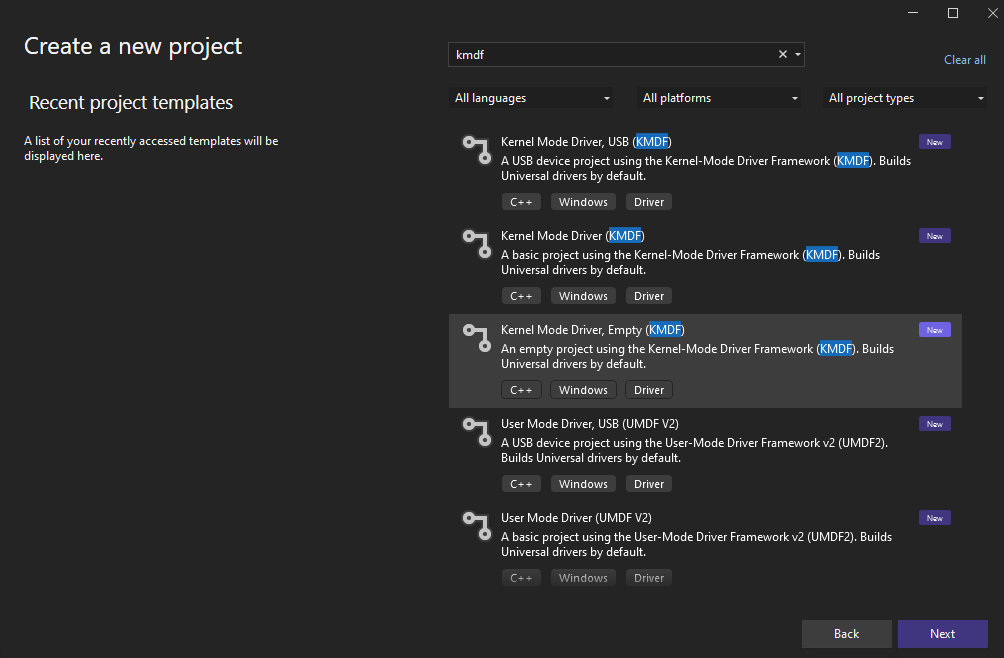
When you launch Visual Studio, you should see the Kernel-Mode Driver Framework (KMDF) project template available. This indicates that your environment is correctly set up for developing and debugging Windows filter drivers.
Pick Kernel Mode Driver (Empty) as your starting point:
Go to the properties to your project, and modify Additional Dependencies like so:
%(AdditionalDependencies);$(KernelBufferOverflowLib);$(DDK_LIB_PATH)ntoskrnl.lib;$(DDK_LIB_PATH)hal.lib;$(DDK_LIB_PATH)wmilib.lib;$(DDK_LIB_PATH)fltMgr.lib;$(KMDF_LIB_PATH)$(KMDF_VER_PATH)\WdfLdr.lib;$(KMDF_LIB_PATH)$(KMDF_VER_PATH)\WdfDriverEntry.lib

What we are doing here, is adding fltMgr.lib to the list.
Now, create new file – Driver.c in your project:
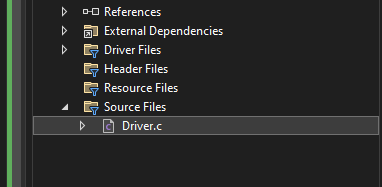
Below is the sample code for our filter driver, that will introduce 5 second delay to every read operation:
#include <fltKernel.h>
#include <dontuse.h>
#include <suppress.h>

#pragma prefast(disable:__WARNING_ENCODE_MEMBER_FUNCTION_POINTER, "Not valid for kernel mode drivers")

PFLT_FILTER gFilterHandle;
FLT_PREOP_CALLBACK_STATUS PreOperationCallback(PFLT_CALLBACK_DATA Data, PCFLT_RELATED_OBJECTS FltObjects, PVOID* CompletionContext);
NTSTATUS UnloadDriver(FLT_FILTER_UNLOAD_FLAGS Flags);

const FLT_OPERATION_REGISTRATION Callbacks[] = {
    { IRP_MJ_READ, 0, PreOperationCallback, NULL },
    { IRP_MJ_OPERATION_END }
};

const FLT_REGISTRATION FilterRegistration = {
    sizeof(FLT_REGISTRATION), // Size
    FLT_REGISTRATION_VERSION, // Version
    0, // Flags
    NULL, // Context
    Callbacks, // Operation callbacks
    UnloadDriver, // Corrected FilterUnload
    NULL, // InstanceSetup
    NULL, // InstanceQueryTeardown
    NULL, // InstanceTeardownStart
    NULL, // InstanceTeardownComplete
    NULL, NULL, NULL // Reserved
};

FLT_PREOP_CALLBACK_STATUS PreOperationCallback(PFLT_CALLBACK_DATA Data, PCFLT_RELATED_OBJECTS FltObjects, PVOID* CompletionContext)
{
    UNREFERENCED_PARAMETER(Data);
    UNREFERENCED_PARAMETER(FltObjects);
    UNREFERENCED_PARAMETER(CompletionContext);

    // Introduce a 5-second delay
    LARGE_INTEGER delay;
    delay.QuadPart = -50000000LL; // 5 seconds
    KeDelayExecutionThread(KernelMode, FALSE, &delay);

    return FLT_PREOP_SUCCESS_NO_CALLBACK;
}

NTSTATUS DriverEntry(PDRIVER_OBJECT DriverObject, PUNICODE_STRING RegistryPath)
{
    UNREFERENCED_PARAMETER(RegistryPath);

    NTSTATUS status;

    status = FltRegisterFilter(DriverObject, &FilterRegistration, &gFilterHandle);
    if (NT_SUCCESS(status)) {
        // Start filtering I/O
        status = FltStartFiltering(gFilterHandle);
        if (!NT_SUCCESS(status)) {
            FltUnregisterFilter(gFilterHandle);
        }
    }

    return status;
}

NTSTATUS UnloadDriver(FLT_FILTER_UNLOAD_FLAGS Flags)
{
    UNREFERENCED_PARAMETER(Flags);

    FltUnregisterFilter(gFilterHandle);

    return STATUS_SUCCESS;
}
Build your driver (cntrl+shift+B)
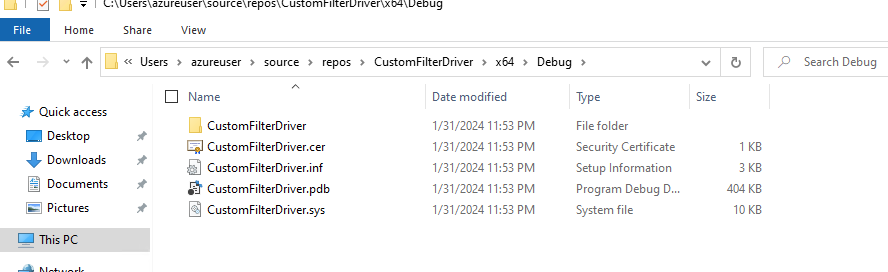
Copy the contents of debug folder to the target system. In this example, I’ll be using C:\Drivers
At this point, i suggest you to take a VM snapshot of your development VM, so you can easily revert the changes.
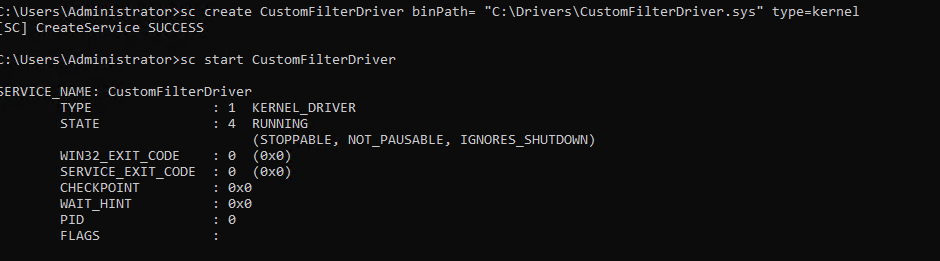
You can install your custom driver with:
sc create CustomFilterDriver binPath= “C:\Drivers\CustomFilterDriver.sys” type=kernel
However, if you will attempt to start it, with sc start CustomFilterDriver it will fail to do so:

The issue you’re encountering is that your filter driver is missing registry keys that inform the Filter Manager how it should work with your driver. Specifically, information such as the “altitude” is required. The altitude in this context refers to a unique identifier that determines the order in which filter drivers are loaded relative to each other. Without these registry keys, the Filter Manager cannot correctly position or initialize your filter driver within the system’s driver stack.
You can fix it by adding missing keys to the registry:
reg add HKLM\SYSTEM\CurrentControlSet\Services\CustomFilterDriver\Instances /v “DefaultInstance” /t REG_SZ /d “DM”
reg add HKLM\SYSTEM\CurrentControlSet\Services\CustomFilterDriver\Instances\DM /v “Altitude” /t REG_SZ /d “123456”
reg add HKLM\SYSTEM\CurrentControlSet\Services\CustomFilterDriver\Instances\DM /v “Flags” /t REG_DWORD /d 0
After that, the driver should start successfully:
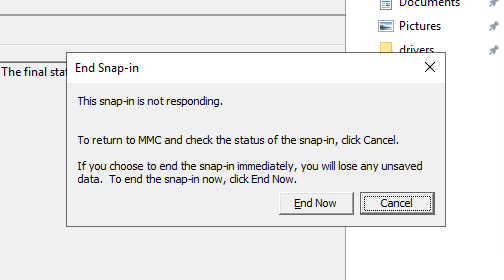
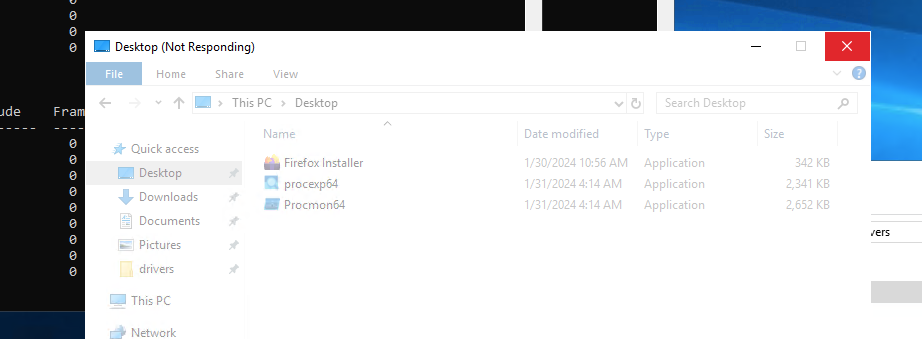
At this point you will see that system starts to behave very odd.
Windows freezing:
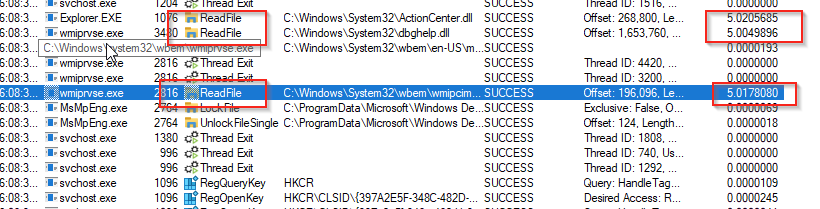
Because for every read operation system issues we added 5 seconds delay, as visible on process monitor:
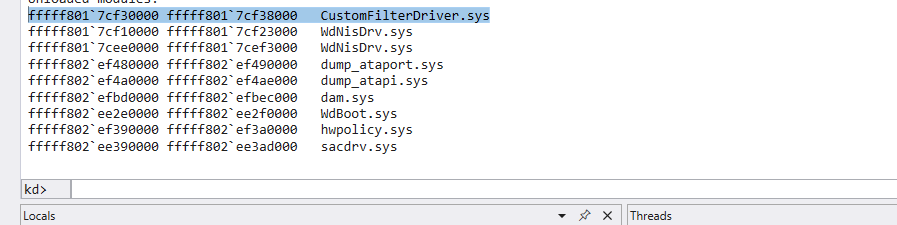
You can confirm that your custom kernel module is loaded by connecting the debugger as we discussed at the beginning of this guide. Once connected, you can issue the appropriate commands through the debugger (e.g lm) to verify the module’s presence and status within the system.
I hope this information was helpful. If you followed the exercise, you should now have a VM behaving in such an unusual manner that it demonstrates the impact of having too many filter drivers or a poorly performing filter driver on the OS.