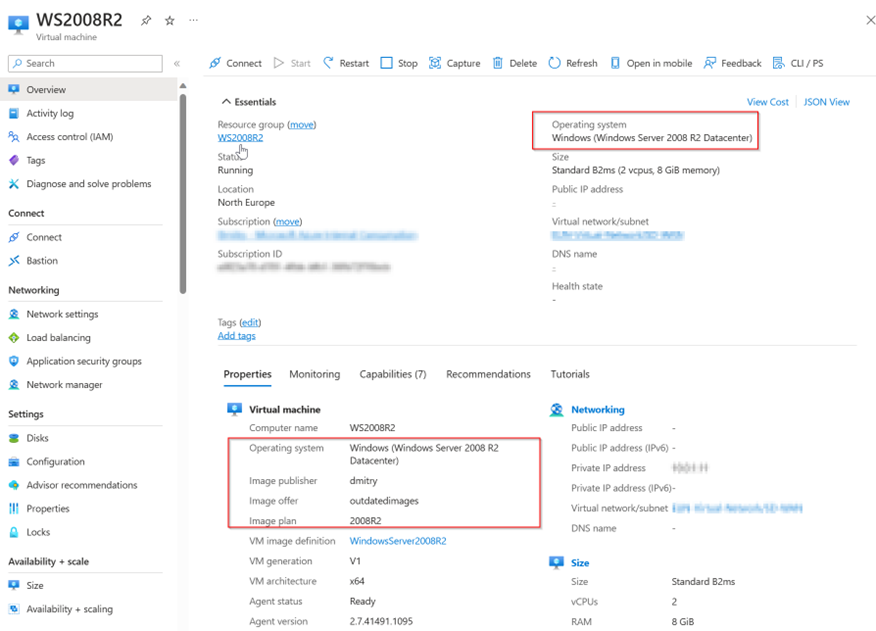
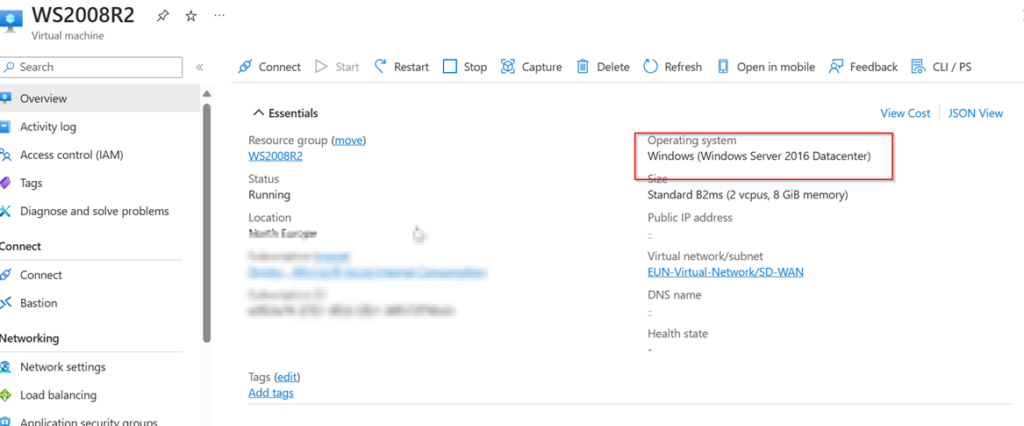
How to Upgrade Legacy Azure Windows VMs Not Supported by Azure’s Native In-Place Upgrade Feature
Here, I’ll walk you through the process of upgrading a legacy Azure Windows VM without relying on any on-premises solutions or exporting the drive.
Prerequisites
- Agreed downtime for the VM
- Basic familiarity with Azure Portal, Hyper-V, and PowerShell
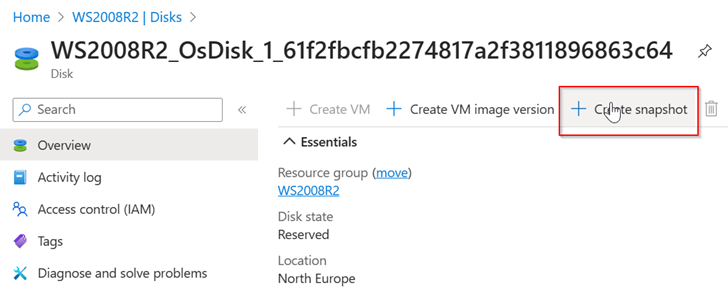
Step 1: Create an OS Disk Snapshot
- Stop the VM.
- Create a snapshot of the OS disk.
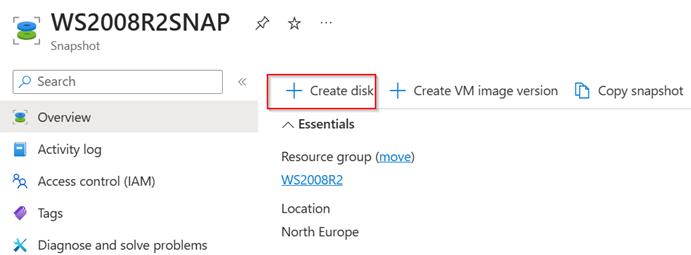
Step 2: Create a Disk from the Snapshot
- Navigate to the snapshot you’ve just created.
- Create a disk from this snapshot.
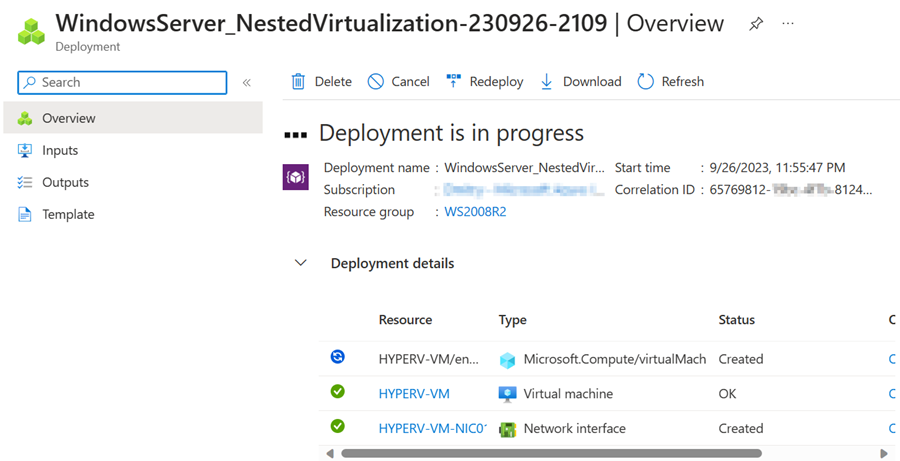
Step 3: Deploy a Hyper-V VM
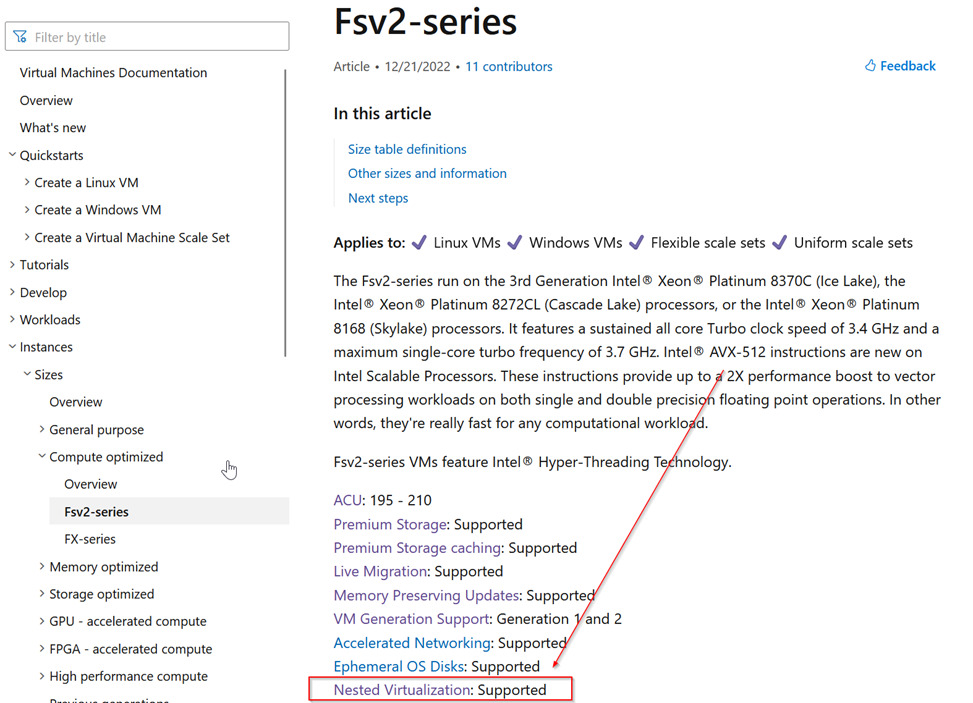
Ensure that the VM SKU you choose supports nested virtualization. For this example, I’m using Standard_F32s_v2. You can verify SKU support for this feature here.
If you’re not using Bicep or ARM templates, consider adopting them. :)
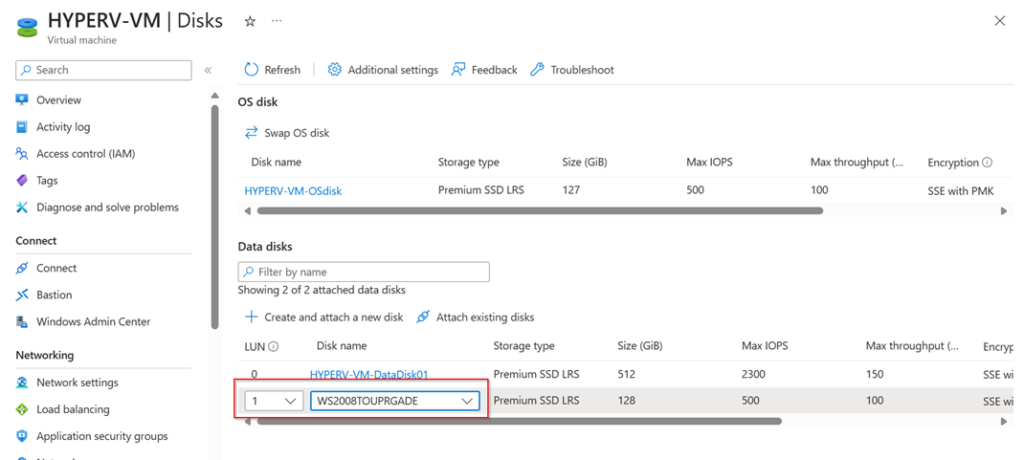
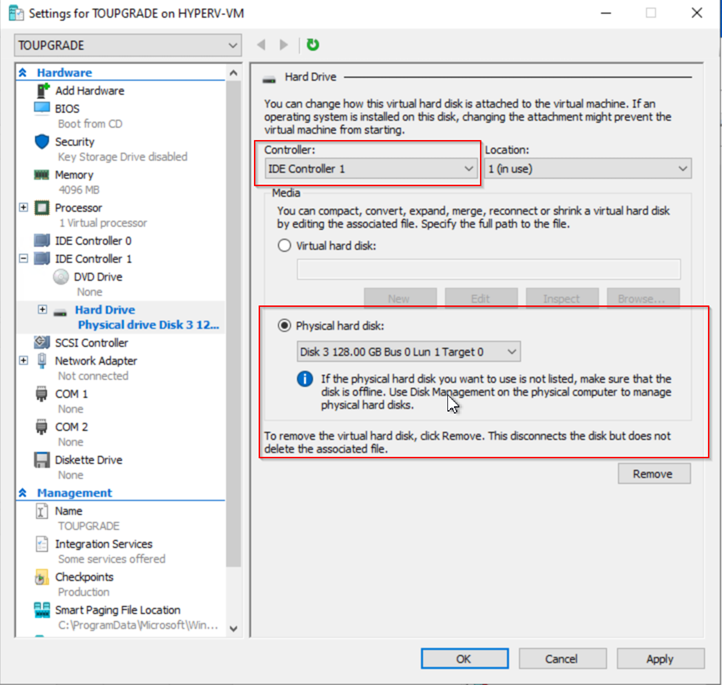
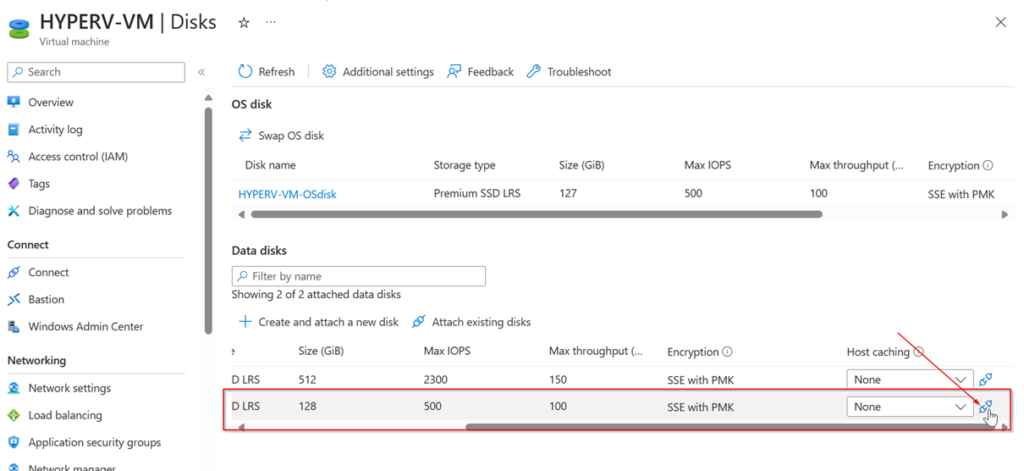
Step 4: Attach the Disk
- Go to your newly provisioned Hyper-V VM.
- Attach the disk you created from the snapshot.
Step 5: Install Hyper-V Role
- RDP into your VM.
- Open PowerShell as an administrator and run the following command:
Install-WindowsFeature -Name Hyper-V -IncludeManagementTools -Restart
The server will reboot automatically upon completion.
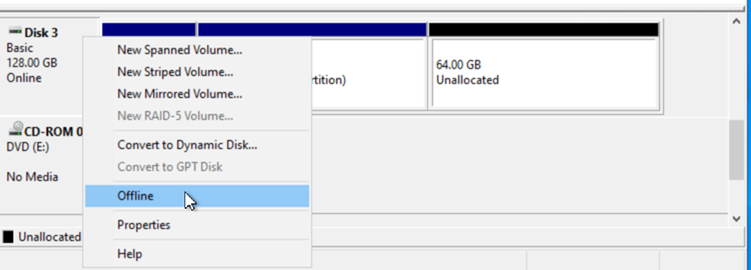
Step 6: Prepare the Disk for Upgrade
- After reboot, open Disk Management.
- Bring the attached disk offline.
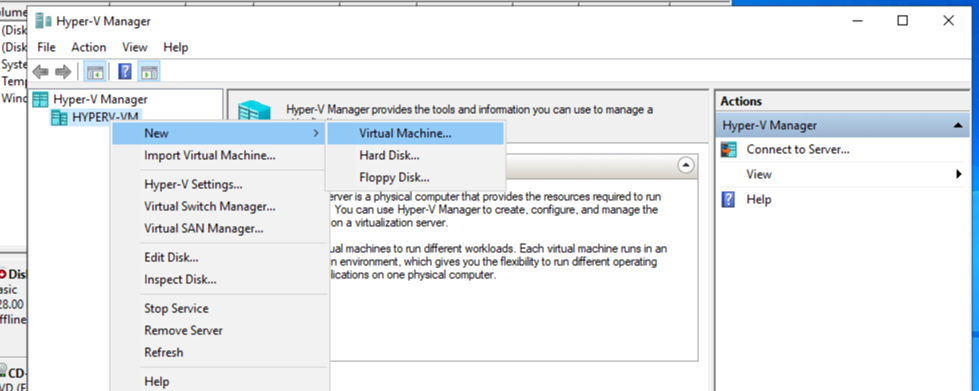
Step 7: Create a New Virtual Machine in Hyper-V
- Open Hyper-V Manager.
- Create a new virtual machine.
- Specify the generation for your new VM (most likely Generation 1 for legacy workloads).
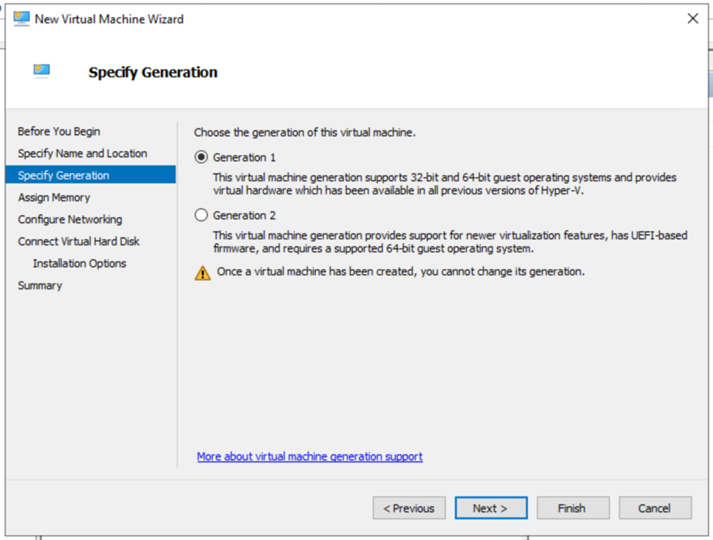
- Select “I will install the operating system later.”
- Add the existing physical hard disk as the VM’s disk.
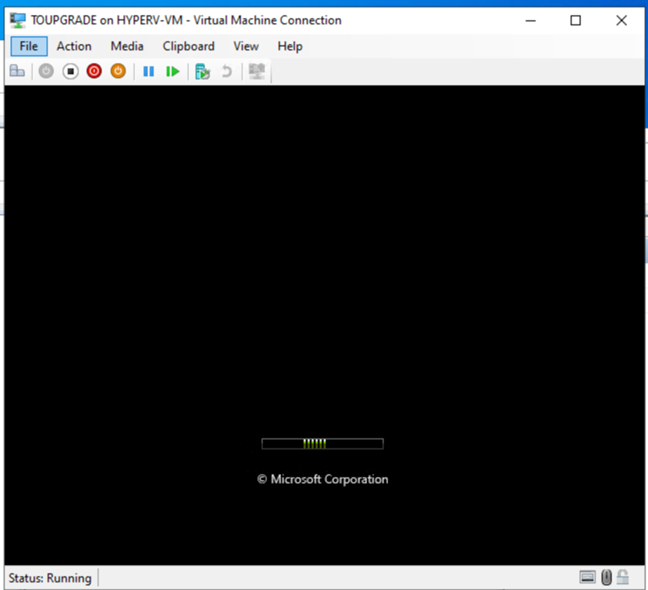
Step 8: Boot the VM
Start the VM. You should see your legacy workload booting up.
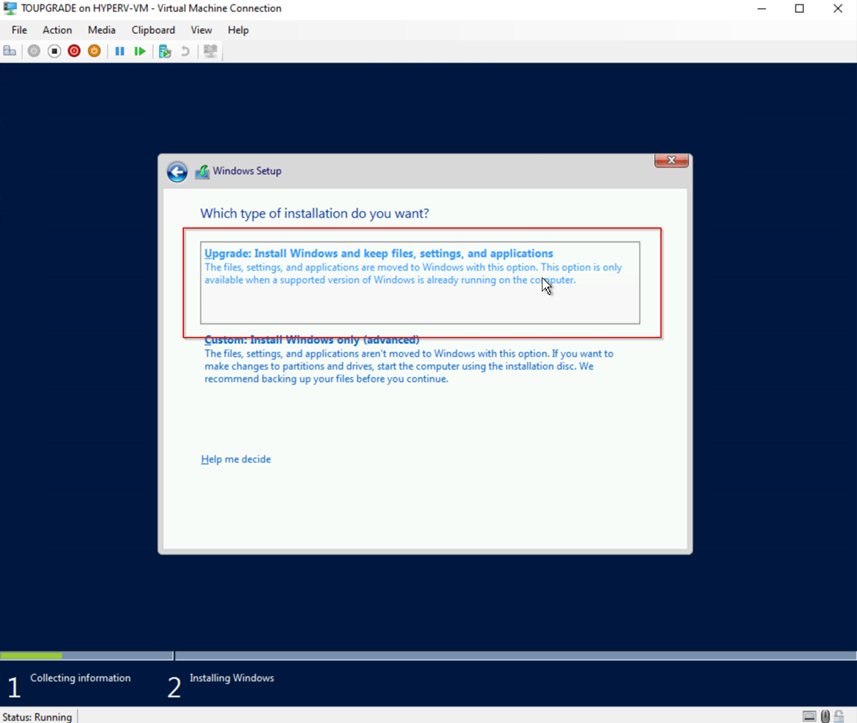
Step 9: Perform the Upgrade
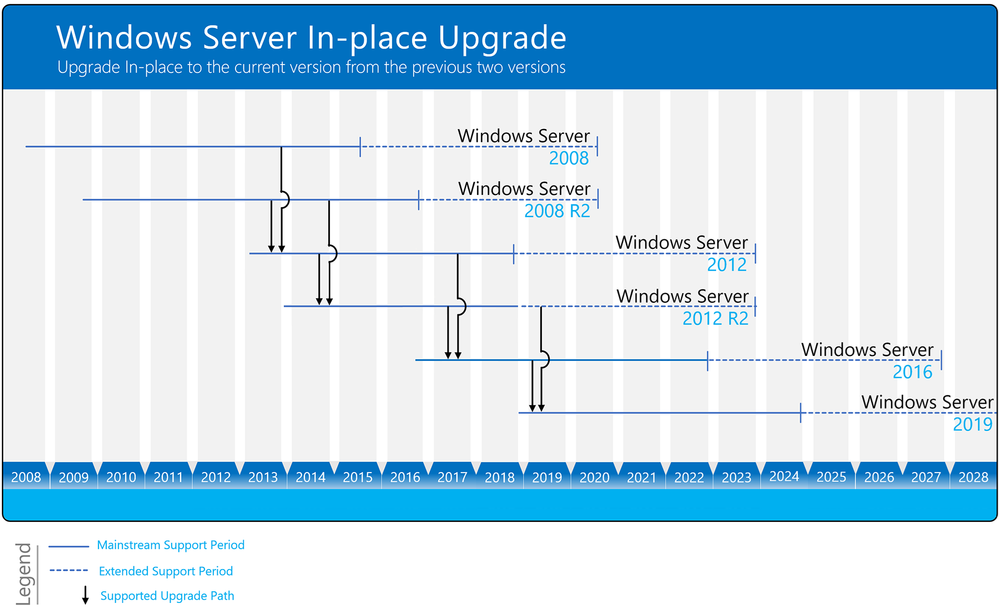
For this example, I’m using ISOs from a Visual Studio subscription. Your organization may have its own ISO repository. The upgrade path for a Windows Server 2008 R2, in this case, would be 2008 R2 -> 2012 R2 -> 2016. Note that you can’t skip versions during an in-place upgrade.
Download the ISOs
You can download the ISOs directly to your server using a script like this:
if (-Not (Test-Path "C:\Temp")) {
    New-Item -Path "C:\Temp" -ItemType Directory
}
$url = "https://myvs.download.prss.microsoft.com/dbazure/en_windows_server_2012_r2_x64_dvd_2707946.iso?MYTOKEN"
$destination = "C:\Temp\en_windows_server_2012_r2_x64_dvd_2707946.iso"

Invoke-WebRequest -Uri $url -OutFile $destination

if (Test-Path $destination) {
    Write-Host "File downloaded successfully to $destination"
} else {
    Write-Host "File download failed"
}
Proceed with the Upgrade
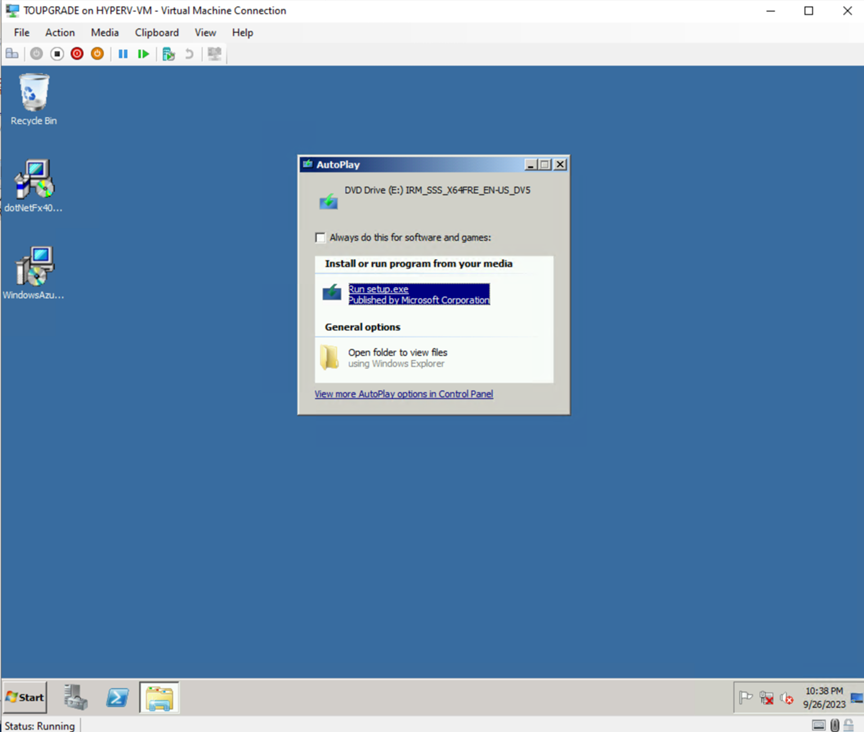
- Attach the downloaded ISO to your VM.
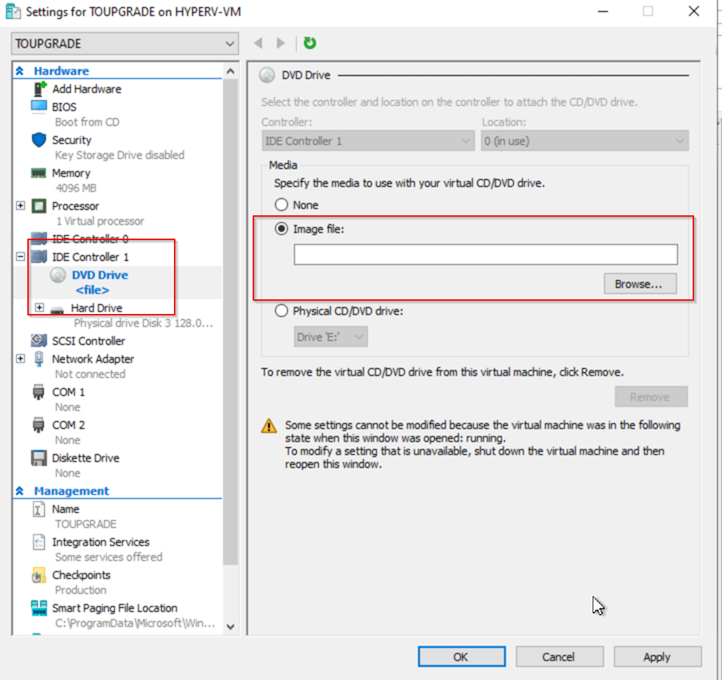
- Follow the on-screen instructions to upgrade.
Step 10: Finalize the Upgrade
- Shut down the VM gracefully.
- Detach the upgraded drive from the Hyper-V VM.
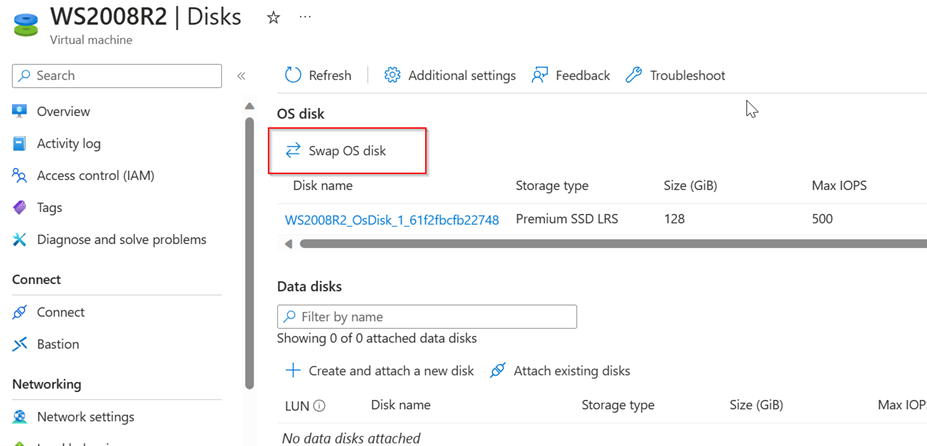
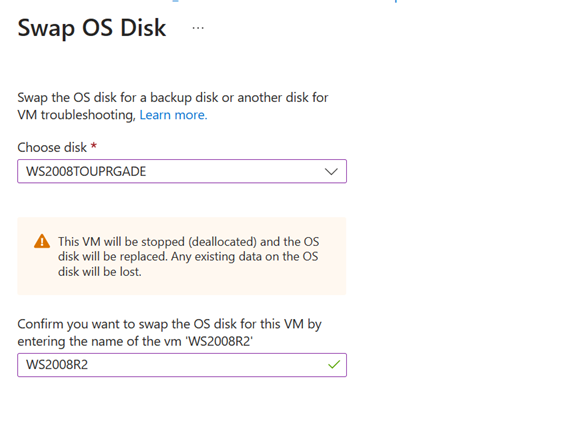
- Swap the OS disk on your original Azure VM with the upgraded disk.
- Start the VM and perform basic smoke tests.
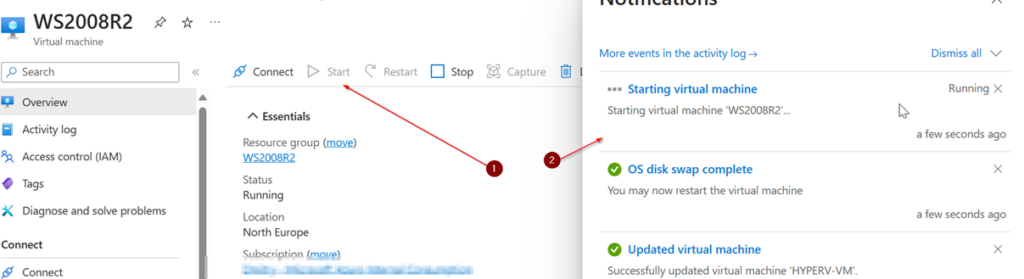
Congratulations, you’ve successfully upgraded your legacy Azure Windows VM!